Single Gallon Walstad – My First Walstad

1 gal Dec 2013 2

I wanted to try using the Walstad method on a smaller tank just to give myself an idea of how everything would work out. If you’re not familiar with the work of Diana Walstad, check out some of these links: Aquarium Wiki, Amazon Page, or Aquariss Interview. In its most basic form, you first need to put down soil, which gives the plants all of the nutrients they need and gives good bacteria and small organisms places to thrive. However, soil on its own in the tank would result in too high a concentration of nutrients diffusing into the water column, causing algae blooms, toxin level spikes, and generally making the tank brown and muddy. So, you need some sort of a “cap” material to put over the soil – usually sand or gravel.

Many people setting up their first Walstad run into issues with air bubbles breaking through the cap, spewing soil into the water. Others have trouble figuring out the right depths of materials to use, or have trouble planting. Basically, there are many potential pitfalls when using a multi-step method for setting up a tank, and I wanted to run into them with an easily manageable tank that I wouldn’t min destroying.

It took me two tries to get the material depths decent, and I learned that it is a lot easier to wet your soil before putting it in the tank. This way, fewer air bubbles form, and the soil can be used to aquascape the terrain to some extent. I used dark sand rather than play sand. As I mention in the post about preparing a quarantine tank in a moment’s notice, I always keep extra seeded filter media on hand. I also used water and plants from an established tank along with some Tetra SafeStart, so the tank was effectively cycled pretty much immediately.

The second day I did a 50% water change, mostly to remove tannins, and refilled it with water from an established tank. Then I threw in some snails – Ramshorns and Malaysian Trumpet Snails – to eat any decaying plant matter and stir up the substrate.

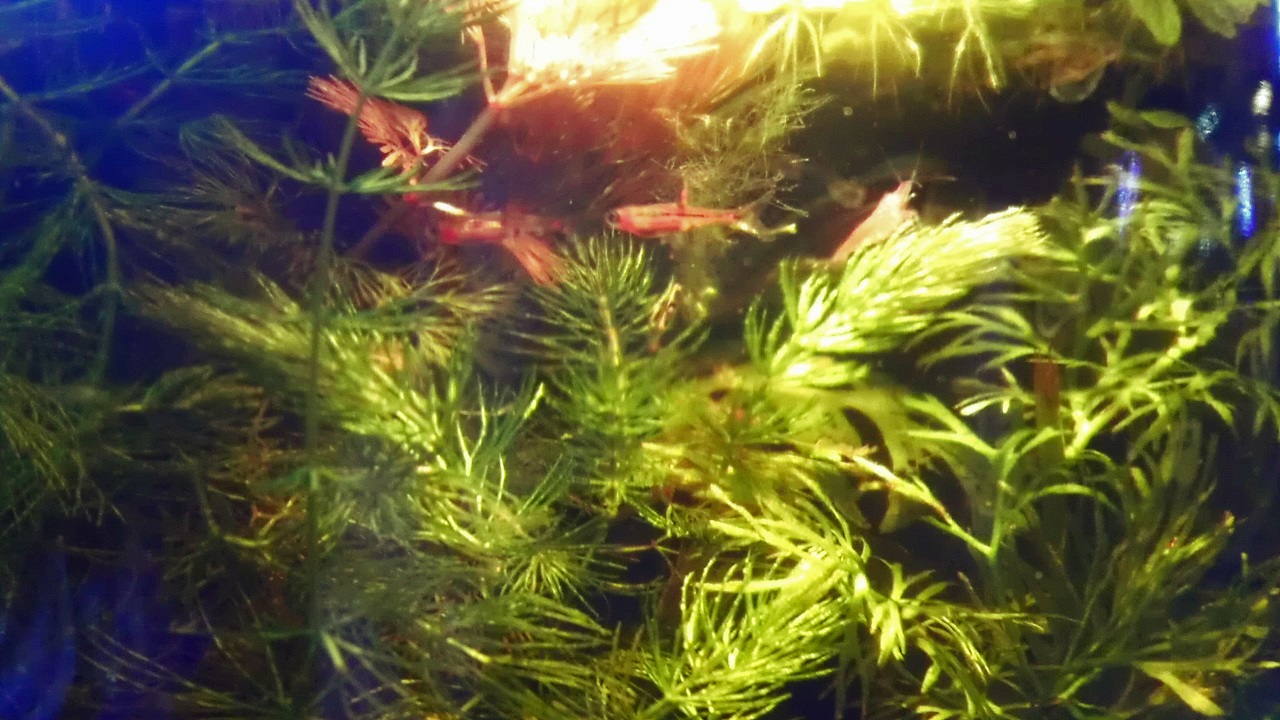
After a week of growth and testing levels of ammonia, nitrites, and nitrates to ensure all really was well, I added some red cherry shrimp. These shrimp had come from my 150, so many had reverted back to wild-colors (browns mostly). I did water changes weekly, and topped off the tank if it looked low. I also threw in three chili rasboras. Chili rasboras are often mentioned as being territorial and needing tanks of 10 gallons or more. After seeing aggression issues play out with my pygmy gourami, I wanted to see how these little rasboras would interact before I began planning a tank for them.

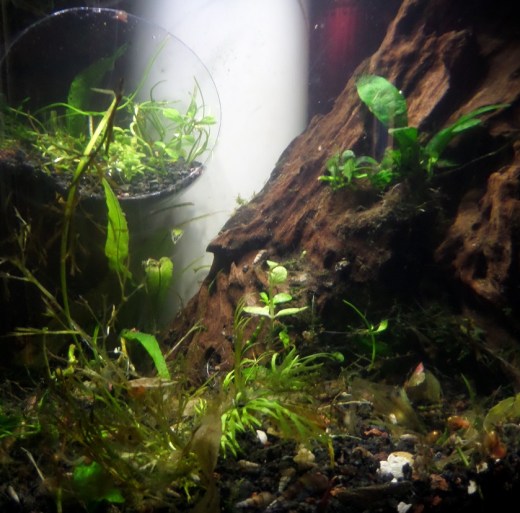
Here is my mini-walstad after a month of growth:

1 gal Dec 2013 4

Here are the full tank specs:

Tank – One Gallon Anchor Hocking Heritage Hill Storage Jar, available here

  • NOTE that smaller tanks are much more difficult to maintain and keep balanced. I was using this originally as a trial tank, and I have a good deal of experience by this point in caring and maintaining freshwater tanks. I recommend beginning with a much larger tank as your first. If you want to go with something small like this, then please do not add anything more than plants until you are sure the tank has cycle fully and is stable.

Filter – AZOO Mignon 60, available here

  • Walstad tanks usually do not have filters. I used one to originally cycle the tank and keep up water flow. I later removed it, and the tank did fine for the last month before I dismantled it to make room for a larger Walstad bowl.

Heater – Aquatop Nano Aquarium Heater with Thermostat, NH-15W, available here

Lighting – Ikea Black Jansjo Desk Work Led Lamp Light, available here

Substrate – Miracle-Gro Organic Choice Potting Mix, available here, capped with Carib Sea ACS00821 Tahitian Moon Sand, available here. The sand winds up being almost shiny, which I wound up not liking very much. It is a very nice dark black though.

4.12 Gallon Aquatop Tank – Week 1

Here is one of my newer creations in its beginning stages. I plan on moving around some of the plants once they’ve developed root systems and could take being replanted while maintaining their health. I also will be adding a baffle in front of the filter. I have a small Azoo filter with variable flow on the tank right now. I want to keep it at higher flow in preparation for when I add the blue berry shrimp for which the tank was planned. That will be another post in the near future!

Anyway, here is the tank in its initial stages. I’m still not sure if I want to remove the rocks entirely. I found these in my backyard, but it was difficult to find stones with enough detail and similar color, texture, cleavage, etc. I plan on having the front be a carpet of HC in the middle with grass on the far sides. Once everything has grown in (which will take a few months) I might add a valley of sorts filled with gravel or smaller stones to help create depth within the tank. Separating the gravel/small stones by size, then using the smallest near the back and largest near the front can really make the tank look much deeper than it really is.

Here’s a more complete rundown of the tank right now:

Tank – Aquatop 4.12 Gallon Cube, Low-Iron High-Clarity Glass, available here

Filter – Azoo Mignon Filter 60, rated for up to 3.5 gallons, available here

  • Note: I added extra filter media, and the tank will be heavily planted, so this filter should be fine. It is in place mostly to add water flow to the tank.

Substrate – Fluval Shrimp Stratum, available here

  • This is my first tank using this substrate. I’ll keep you posted on how it works. So far my initial reaction is similar to most reviews you will find of this product. It’s very light weight, so planting is difficult. It’s also pricey for the amount compared to other substrates. I love it’s texture though, and it seems to be working well with the plants so far.

Lighting – Dolphin Curve Pure White 6500k LED, available here . I really like the light so far, and will be adding a full post with a review of it soon since I can’t seem to find any thorough reviews for this particular light fixture.

Heater – Aquatop Nano Aquarium Heater with Thermostat, NH-15W, available here

Plants – see the diagram below with labels on each plant type. (Click to make full size, same goes with all pics on this site)

Plant Labels

The background rotala indica and watersprite are actually much more full and dense than the picture shows due to the filter. Note to self: for future tank shots, shut off the filter flow for a few minutes! I’m big on making low maintenance tanks though, so instead I plan on adding a plastic baffle that will direct the water current toward the front of the tank, rather than sideways along the background plants.

I also keep floating plants in all of my tanks. It began after I tried my first Walstad tank. Diana Walstad’s Ecology of the Planted Aquarium was an enormous help in how I have designed all of my new tanks. She stresses the importance of variety in tanks to create balance. Floating plants are great at removing toxins and excess nutrients from the water column. They also help diffuse light that might be too strong for some plants, and provide a great home for beneficial bacteria and microoranisms that keep tanks healthy and balanced. In this tank, I have duckweed and salvinia spangles. Right now, without the baffle, many of them keep getting pushed down into the tank and caught in the background plants. Can’t wait to fix my water flow problem…

Hanging Glass Aquarium Ornaments – DIY Plastic Version

When looking through various websites to see what cool gadgets or new ideas might be available to try on my tanks, I ran across these on a website out of Hong Kong called Aquarium HK. I went back to find them to make this post only find that the site has been transitioned over to Hinterfeld.com, but these pics were still up of the moss hanger.

I wasn’t sold on them, but I did love the look of the moss hanging mid-air (really mid- water, I guess) in the first picture posted here. Once it had fully grown out and couldn’t be seen any more, it seemed to have potential. I had been looking for ways to take up some space in my taller tanks without having to redo hardscape or really push my plants to grow faster already. The idea of just being able to place a beautiful plant wherever I might like to fill lacking spaces really appealed to me.

Then I ran across these type of terrarium holders for mosses and special air plants like this one seen on an Etsy site here.

Etsy Globe

There seemed to be many of these globe type ornaments available, but many were rather expensive. I decided to make my own instead. I found clear plastic ornaments, like these from Craftoutlet.com

Then I used an Exacto knife to cut out a circular section that included the hanging part of the ornament, like indicated below.

Clear Ornament

Then I poked two holes in the edge of the newly cut out face, about a centimeter from the edge. I ran a piece of string (fishing line would have been better) through the first hole from the inside of the ornament, then through the second hold from the outside of the ornament. Then I gathered both ends together from the inside of the ornament. This way, when hanging, the strings would pull on the lip of the opening from the inside, naturally keeping the ornament’s opening angled upward. Without the strings this way, the ornaments tended to lose much of the substrate and plants inside!

Here is an example of one of these ornaments in a small growout tank I had going at various angles.