11.33 Gallon – “Death Mountain” Update 1

Update on 11.33 Gallon - "Death Mountain"

Update on 11.33 Gallon – “Death Mountain”

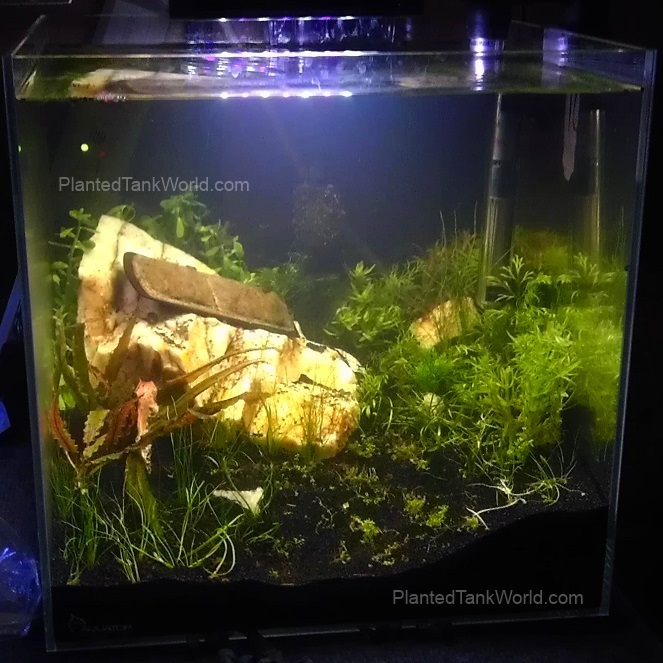
I’ve decided to dub this tank “Death Mountain” for now, though this is certainly more lively and friendly than its namesake.

Death Mountain from Legend of Zelda: Orcarina of Time.

Death Mountain from Legend of Zelda: Orcarina of Time.

Here is how each of the plants have been doing:

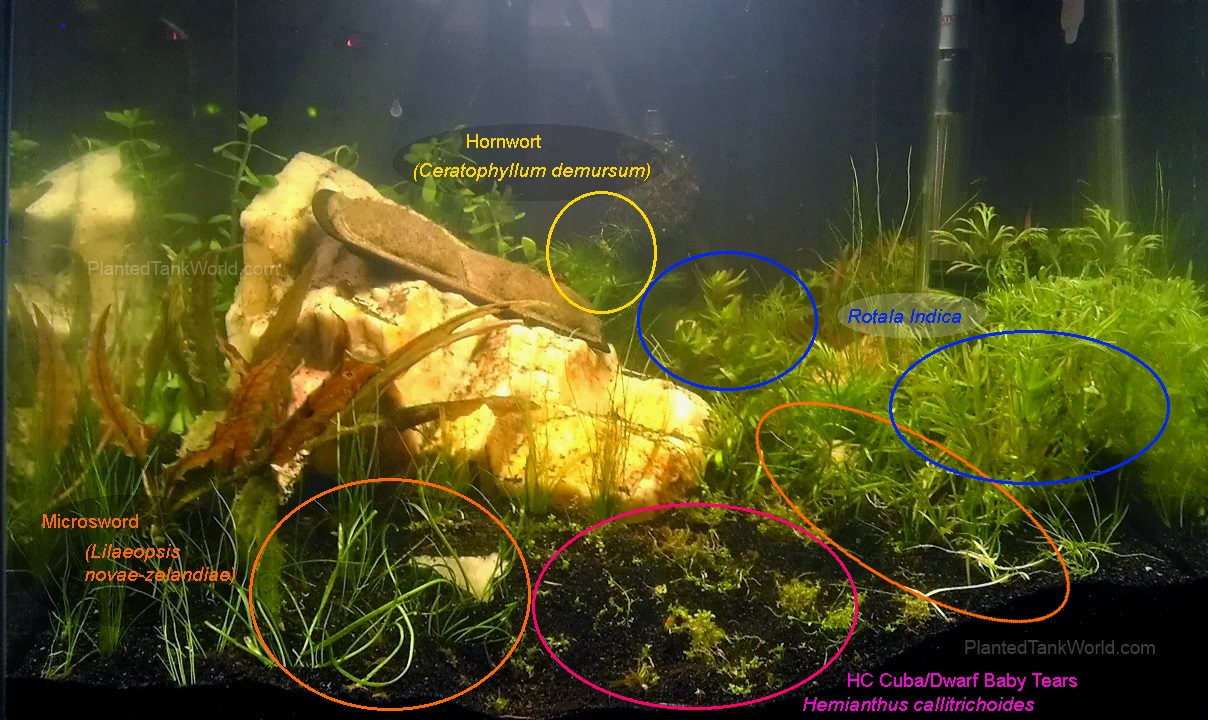
Hornwort/Coontail (Ceratophyllum demursum) – Growing well. I’ve added some more to the tank. This stuff seems to be pretty indestructible. My main complaints are that it sheds needle like leaves everywhere, making the tank look dirty. The only other negative comment I have is that I wound up with trimmings of it that have exposed stem areas which don’t look nearly as nice grown in areas. 

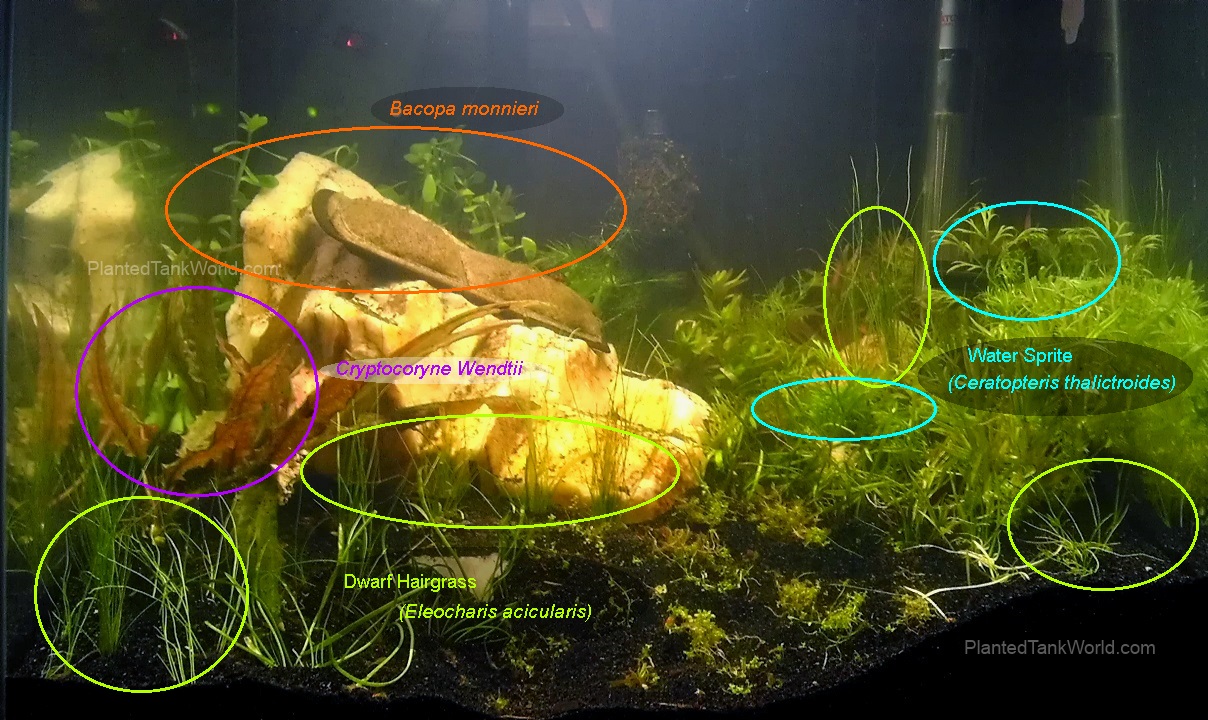
Cryptocoryne wendtii – Had some initial melting, but overall it is doing well. I pretty much expect any crypt I plant to have an initial melting period. Same applies when making drastic changes to water parameters, which should be avoided if there are fish or inverts anyway. I’m liking the red shade its getting.

Water Sprite/Indian Fern (Ceratopteris thalictroides) – I love using this plant and keeping is trimmed low to the ground. Usually I’ve seen it allowed to grow freely, where it can easily grow to 24″ or more. Yet its finely detailed leaf structure makes it a good candidate for planted tanks. And it grows fast, keeping nutrient levels more consistent. This just means trimming or discarding overgrown sections.

Full Tank 4

Bacopa monnieri – This died off entirely. I’ve never been able to get this plant to survive in any of my tanks. I had a few pieces from a plant order earlier that day that I decided to try. Failure. Not sure why this always happens to it in my tanks. If you have an idea, let me know!

Dwarf Hairgrass (Eleocharis acicularis) – Growing well and spreading. It’s not a fast process to carpet a tank. This is the miserable waiting period. I’m trying to disturb it as little as possible and give it lots of light without giving algae a chance to grow.

Rotala indica – This is doing okay. It’s lost a lot of its coloring and is struggling a bit. I’m not sure if it will make it in the long run. For now I plan on leaving it alone as much as possible in hopes that it can adapt to the new environment. 

Full Tank 2

Microsword/Copragrass (Lilaeopsis novae-zelandiae)  – Also doing well. It’s going to take time to get this thick enough for my tastes, but there are already a few new growths visible.

HC Cuba/Dwarf Baby Tears (Hemianthus callitrichoides) – Still not sure if these will make it. They are very CO2 reliant, and I’ve been hesitant to setup the gas CO2 system (should get a better regulator to keep consistent CO2 flow) or dose with Seachem Flourish Excel (shrimp not settled). The other half of my battle with this plant is in the keeping it planted well. I have a decent number of Malaysian Trumpet Snails (MTS) that are wonderful for maintaining substrate, but they do this by digging around just under the surface. With HC’s delicate and shallow roots, this is slowly driving me mad. I had a nice carpet of it in another tank tanks to CO2 gas and later maintaining it with just Flourish Excel.

Full Tank 1

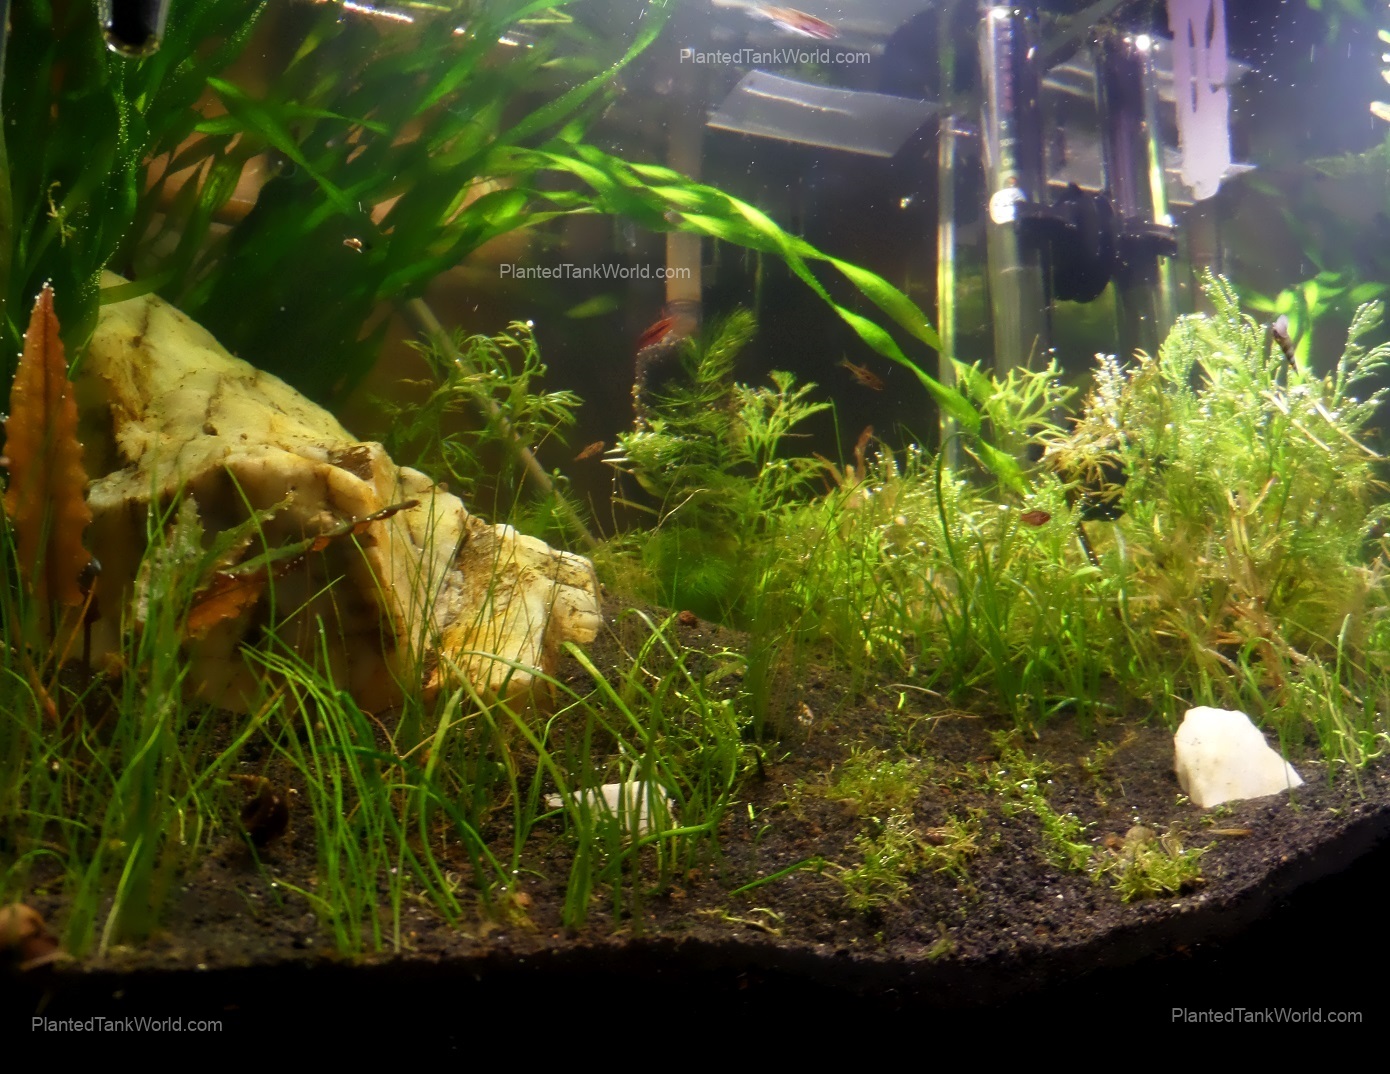
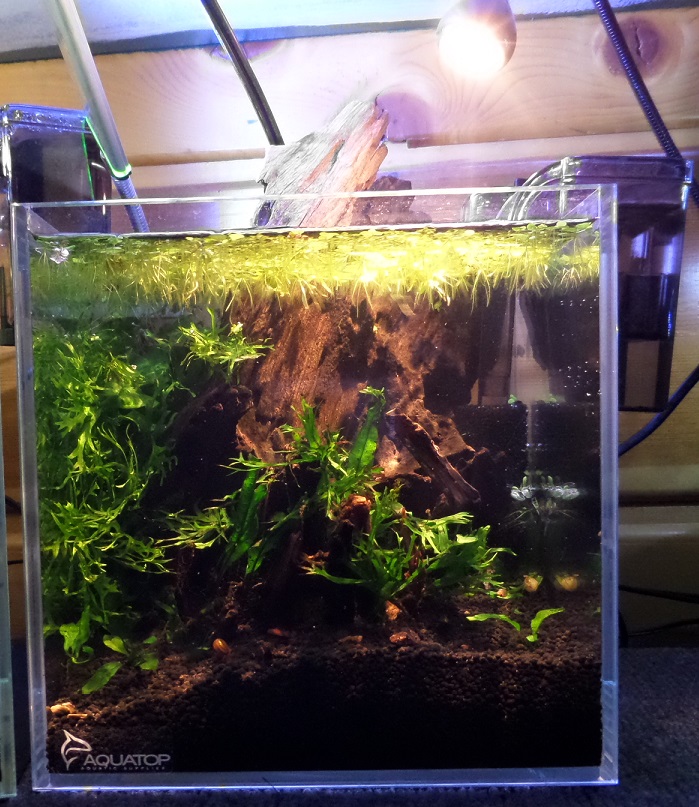
The big circle of light above the tank in the first two photos is due to the floating plants being right under the light. I have both frogbit and salvinia floating to keep the tank in balance and nutrients in check. They also help disperse the light evenly throughout the tank. I usually keep the floaters in place using another new addition to the tank, Vallisneria spiralis in the back left corner. My original plan was to keep all of the plants short and low growing. I was going to have the crypt be the tallest, and maybe even remove that once the carpet grew in. This plan also coincided with an Iwagumi style rockscape. Since my rocks weren’t good for Iwagumi, I am now trying to find a good way to use them that creates balance, perspective, and depth within the tank. Suggestions welcome!

Also, I added chili rasboras and cherry shrimp! I’ve be doing creature profiles on them soon.

11.33 Gallon Walstad – Initial Setup Process

I originally intended this 11.33 to be an Iwagumi inspired tank, but the rocks I had for the tank weren’t right for Iwagumi. Iwagumi uses rocks/stones as the basis of the structure, sort of like a skeleton. The rock I wanted to use broke into rather roundish pieces, making it hard to have any jutting pieces. It also made it hard to find ways to position the rocks near each other. So I had to pick between scrapping the beautiful white marble I’d found in my backyard or try to find a way to use it effectively. I’m not entirely sold on how the tank has come out; I expect there to be some major changes or re-scapes in the future.

11.3 Gallon - Day 1 - That's the filter insert on the large rock.

11.3 Gallon – Day 1 – That’s the filter insert on the large rock.

Initial Tank Setup Process

  1. Gear: Placing the filter intake and outflow along with the heater can affect the balance of a tank. I usually get all of the “gear” ready beforehand to make sure it all will work and electrical cords will reach. Then I see how intrusive the submerged elements will be. You can plant and prepare the tank with these in place (but not running yet) or without them.
  2. Soil Layer: Mix prepared Miracle-Gro Organic Choice Potting Mix with conditioned water to make mud. Spread a 1″ layer, pressing it down gently to remove an air pockets. This layer cushions the rocks.
  3. Rock Layout: Place stones/rocks on top of soil layer. Mine had obvious cleavage/fracture lines, which I pointed in the same direction for each rock. I tried to create a valley of sorts toward the right side of the tank, having the far end of the valley be the vanishing point.
  4. Substrate: Add enough soil to seat the rocks comfortably and create an upward slant toward the back of the tank. Then cap the soil with sand. I used CaribSea Tahitian Moon Sand, but a few weeks later I added a mini layer of black CaribSea Eco-Complete to tone down the substrate. I chose black to offset the white rocks I chose and bring out colors in the planned tank inhabitants.
  5. Water: Add enough conditioned water to soak the entire substrate. Due to the slanting, there was about an inch of water above the substrate in the front. Pour water slowly and direct it onto a plate or piece of plastic to protect the substrate.
  6. Planting: I used mostly scraps from other tanks for this one. Initially I planted dwarf hairgrass, microsword, and others – see the diagram below. Plant everything deep enough to keep it anchored. I recommend using fine tweezers to reduce substrate movement during planting.
  7. Fix-up Sand Layer: Planting a Walstad bring soil up to the surface, so add additional sand where needed to cover soil and fill any tweezer holes.
  8. Water: Fill the tank slowly and, again, pouring onto a barrier to protect the substrate. Use water from an established, healthy tank if you can.
  9. Gear/Cycling: Turn on the heater and filter. I always seed my filters with media from established tanks. In addition to the HOB with cycled filter pads, I also placed a filter insert on one of the rocks below the filter outflor. It was too big to fit in the HOB and looked rather gross, but it definitely helped the tank cycle almost instantly.

Here are all of the names of the plants I used, labeled in the images below.

11.3 Day 1 Plant Labels

11.3 Day 1 Plant Labels 2

Hornwort/Coontail (Ceratophyllum demursum)

Cryptocoryne wendtii

Water Sprite/Indian Fern (Ceratopteris thalictroides)

Bacopa monnieri

Dwarf Hairgrass (Eleocharis acicularis)

Rotala indica

Microsword/Copragrass (Lilaeopsis novae-zelandiae)

HC Cuba/Dwarf Baby Tears (Hemianthus callitrichoides)

Lace Leaf Java Fern and Wood – 2.11 Gallons – Update

SAMSUNG CAMERA PICTURES


Last time I posted on this tank, it was to show off the hardscape and discuss my initial inspiration/motivation. Here was the initial hardscape:

Hardscape and First Plants 4

I’m never a fan of initial tank setup photos. They always look disappointing compared to what they become. Here is the same tank after a second round of planting:

2nd Planting

And, finally, a third round of adding more lace leaf java ferns:

I’m excited to see the java continue to grow and intertwine amid the wood. I also plan to add some shrimp to this tank! Not sure what kind yet. I want to be sure it has settled and would be a good home for them first.

Here’s a rundown on this this tank’s specs as of these final photos:

Tank – Aquatop 4.12 Gallon Cube, Low-Iron High-Clarity Glass, available here

Filter – Azoo Mignon Filter 60, rated for up to 3.5 gallons, available here

Substrate – Fluval Shrimp Stratum, available here

Lighting – Mr. Aqua Ultrathin Aquarium LED Clip Light, available here

  • I’m not sure how I feel about this light yet. It sure is bright, and based on the Mr. Aqua reputation I expect it is a good light. Yet the color is very blue, and it is a bit too large for this tank. I’d probably like and appreciate it more on a different tank. I also tend to like warmer light. For some of the shots above, I moved my little Ikea desk light over to warm up the shots.

Heater – Aquatop Nano Aquarium Heater with Thermostat, NH-15W, available here

Plants – The only plants in here are lace leaf java fern and a floating moss ball I put behind the wood centerpiece. I added it since previously that moss had been floating in a cycled tank and growing well. It only floats because I placed a single cut-out bubble from a sheet of large bubble wrap within the moss using some string. There is also some regular java fern in there, but mostly to keep the tank looking more full for now. There are also some floating plants in there – frogbit an some other random ones from other tanks. They helped it cycle and keep the light from being too bright for the java fern below, which is a low-light plant for the most part.

Here is a shot of the tank that shows off how the equipment is setup. The filter is on the right side. The heater is behind the wood, such that the filter outflow and intake still interact with in front of and behind the wood.

SAMSUNG CAMERA PICTURES

This shot also really helps show off how cold looking the Mr. Aqua light is compared to the Ikea desk lamp. I’m not saying anything about the quality of the lights or ability to grow plants, just the aesthetics they create. I also really love how the main piece of wood juts out above the tank rim. This can be a very effect tool for making smaller tanks look even larger. Getting a decent light balance to really show off this aspect in standard tank shots is hard for me right now, but it would be worth it in the future.

Lastly, here is the tank on my aquarium shelf, next to my 4.12 gallon rimless cube and the 3 gallon bowl upgrade that my original 1 gallon Walstad received. I’ll probably do a post on the bowl Walstad tank once it has settled and I’m a bit happier with it.

SAMSUNG CAMERA PICTURES